MORE INFO
Brake lines are critical items. The potential penalties for improper assembly are severe. Although there is nothing complicated about the procedure and no special tools are required, extreme care must be used in assembly. We strongly recommend that the following procedures be used. - Cut hose to required length.
- Measure distance between parts of adapter fittings along the path that the hose run will follow - allowing for bend radius, hose end length and offset to obtain length and hose required.
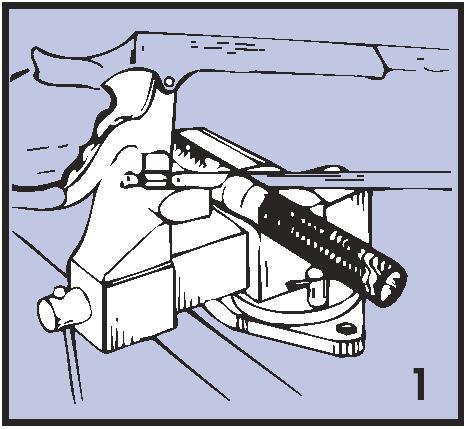
- Cut the hose square with a radiac wheel or a sharp 32 teeth per inch hacksaw blade. It is necessary to wrap it tightly with masking tape before cutting and to cut through the tape. This helps to prevent the stainless wire braid from fraying.
- Trim any frayed end of the braid with a sharp pair of metal snips or diagonal cutters and remove the tape.
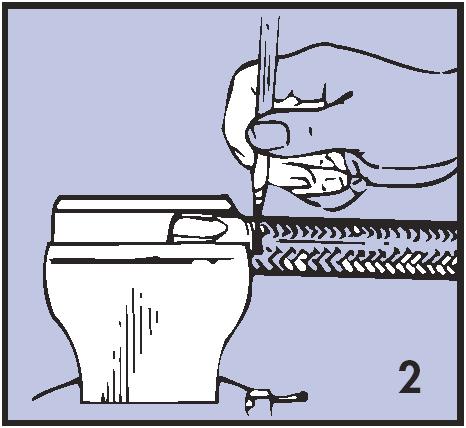
 - Place the socket in a vise and insert the end of the hose into the socket until the hose butts against the bottom of the threads provided for the cutter. Gently pull the hose back until there is a 1/16" to 1/8" gap between the end of the hose and the bottom of the socket - mark hose at bottom of socket with a felt pen so that you can detect any tendency of the hose to be pushed out as you complete the assembly.
 - Lubricate the inside of the hose, the cutter threads and the socket threads. Just about any kind of clean oil will do but we prefer to use an anti-seize compound on the threads. Place the nipple in a vise. Flex muscles.
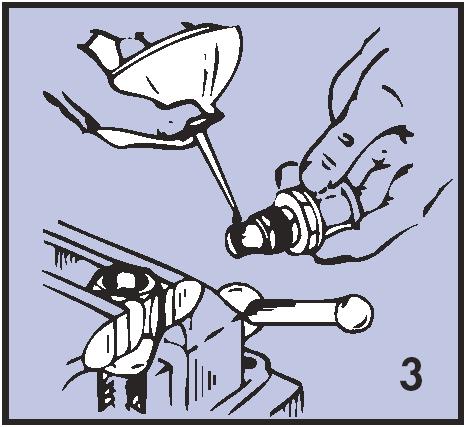 - Push the hose and the socket onto the nipple until the socket threads can be started on the cutter. Start the threads and go as far as you can by hand. Depending on the size of the hose, some force may be necessary in this part of the operation.
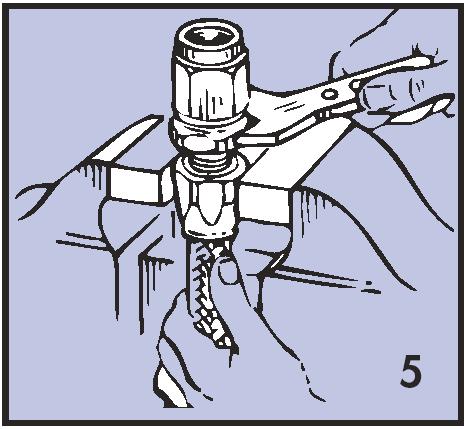
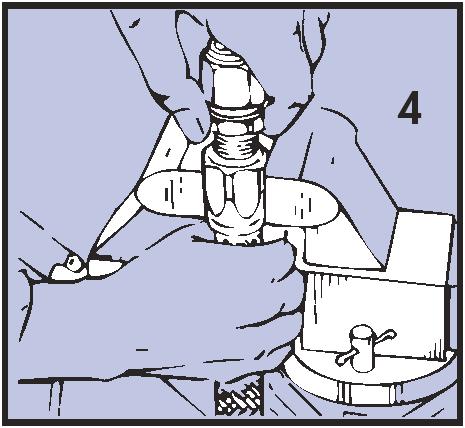 - To complete the assembly it doesn't matter whether the nipple or the socket is held in the vise. Holding one or the other in the vise and using a suitable wrench on the other, tighten the socket onto the cutter threads until the socket is within .060" of bottoming on the nipple. Do not use an adjustable or over-size wrench or you will damage either the nipple or the socket.
 - Check the mark that you made on the hose in step 2. If the hose has backed more than about 1/16" out of the socket as you assembled it, curse and return to step 3.
- Clean the hose and the hose ends with CLEAN solvent.
- It is most unlikely that you will have available any method of pressure checking the assembly before it is installed. Before letting the assembly out of your sight, check the assembly by running the system at full pressure while you observe the hose, hose ends and adapters for leaks.
|